Is the FRP server showing offline on our Status page? You don't have to wait for it. On MediaTek-based Xiaomi devices there is a second way to remove the Google account lock (FRP): the Erase FRP + Userdata feature in SoulAuth Tool. It wipes the FRP and userdata partitions, and the phone starts again from a clean setup screen. It works on MTK v5 and MTK v6 (old and new security), and the whole job usually takes just a few minutes.
What You Need
- A Windows PC with the latest SoulAuth Tool, signed in to your account
- Enough credit for the job (MTK v6 New Security needs credit for two steps)
- The official firmware for the exact model, from our Firmware Downloads page
- A good USB-C cable plugged into a rear USB 3.0 port, with no hub in between
- A battery charged to at least 40%
Step 1: Load the Firmware and Pick the Server DA
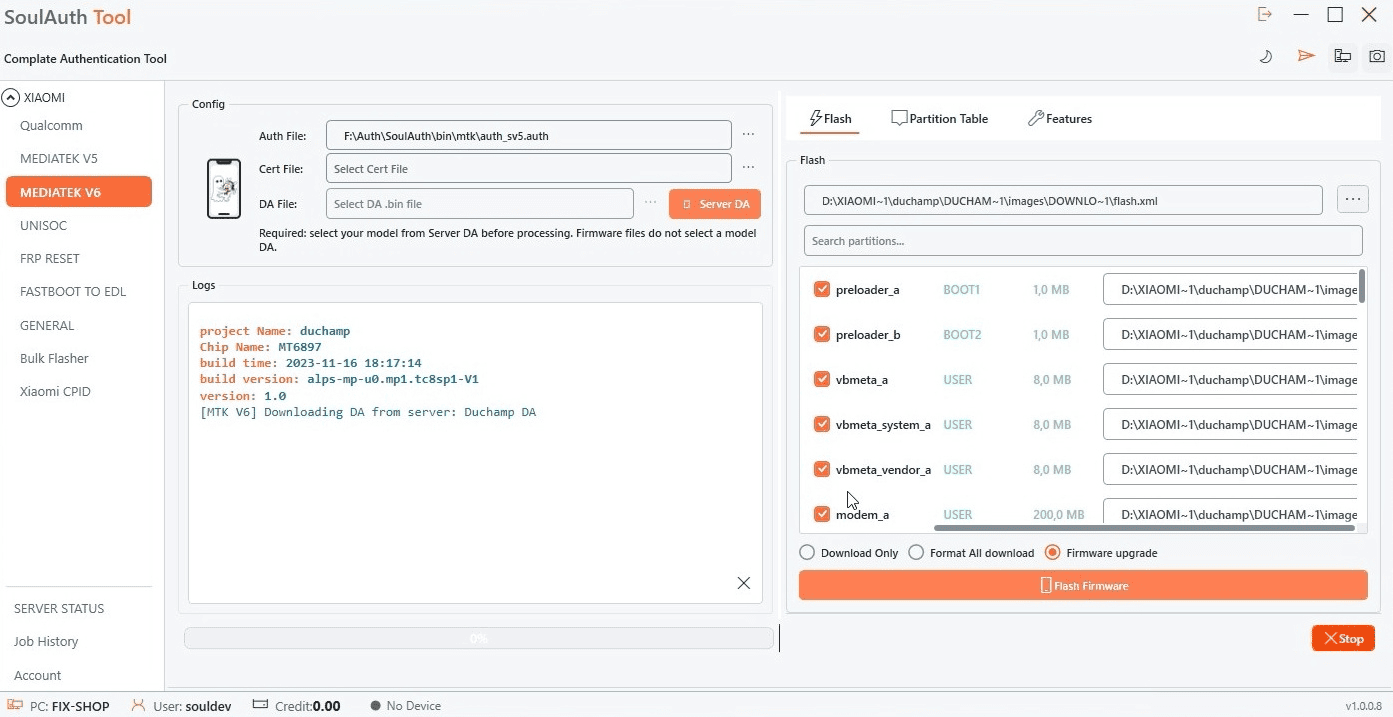
Open MediaTek V6 in the left menu (or MediaTek V5 for older models). In the Flash tab, load the firmware of the device, then click Server DA and pick the exact model. The tool downloads the matching DA, and the log shows Downloading DA from server.
Step 2: Open Features and Choose Erase FRP + Userdata
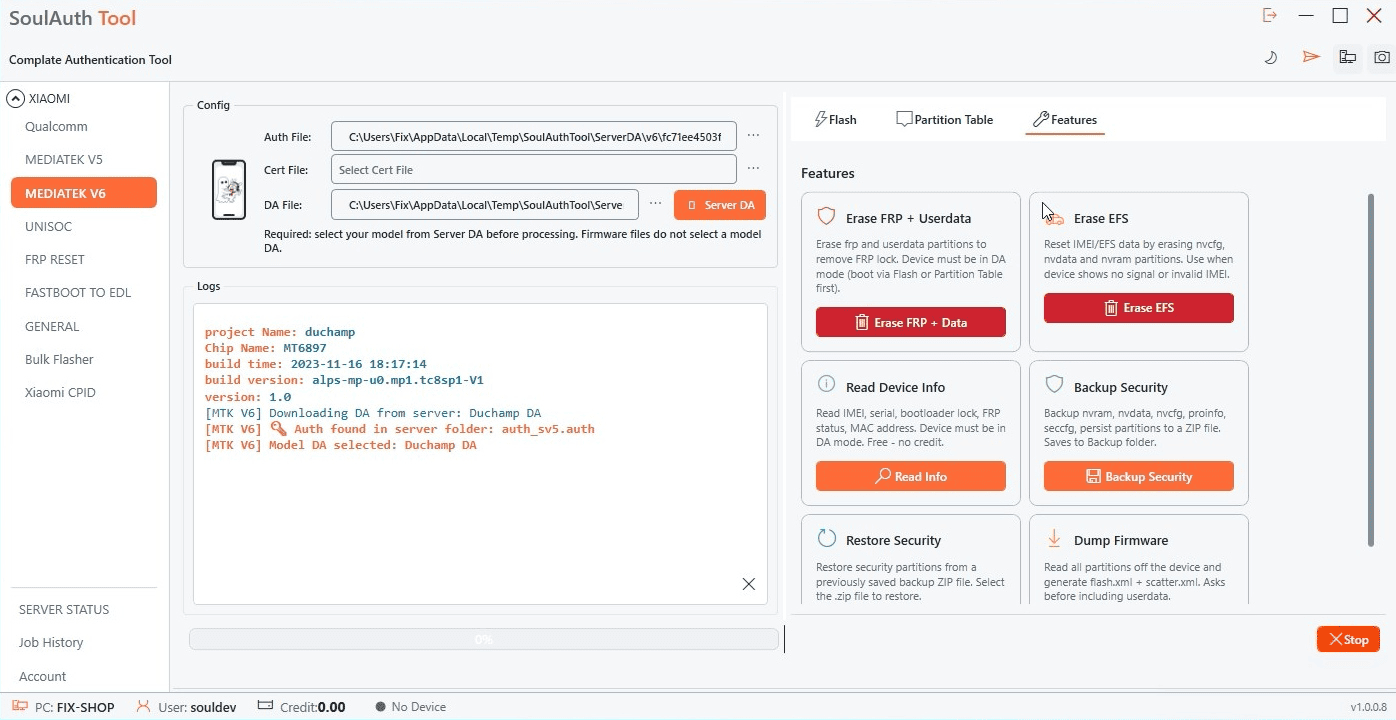
Switch to the Features tab. The log now confirms that the auth file was found and the model DA is selected. In the Erase FRP + Userdata card, click the red Erase FRP + Data button.
Step 3: Confirm the Erase
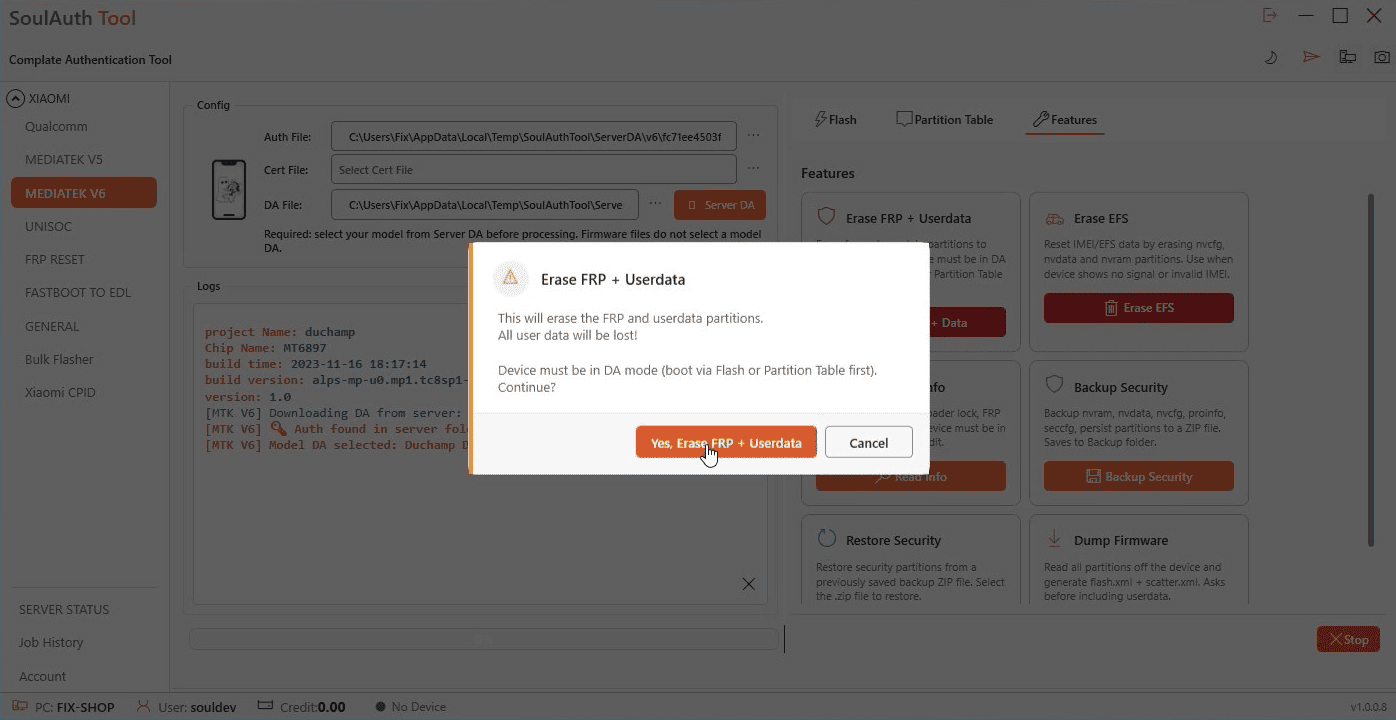
The tool asks you to confirm, because the FRP and userdata partitions will be wiped and all user data will be lost. If you are ready, click Yes, Erase FRP + Userdata. Then connect the powered-off phone in BROM mode. The tool waits for it and puts it into DA mode on its own.
Step 4: Accept the Credit Confirmation
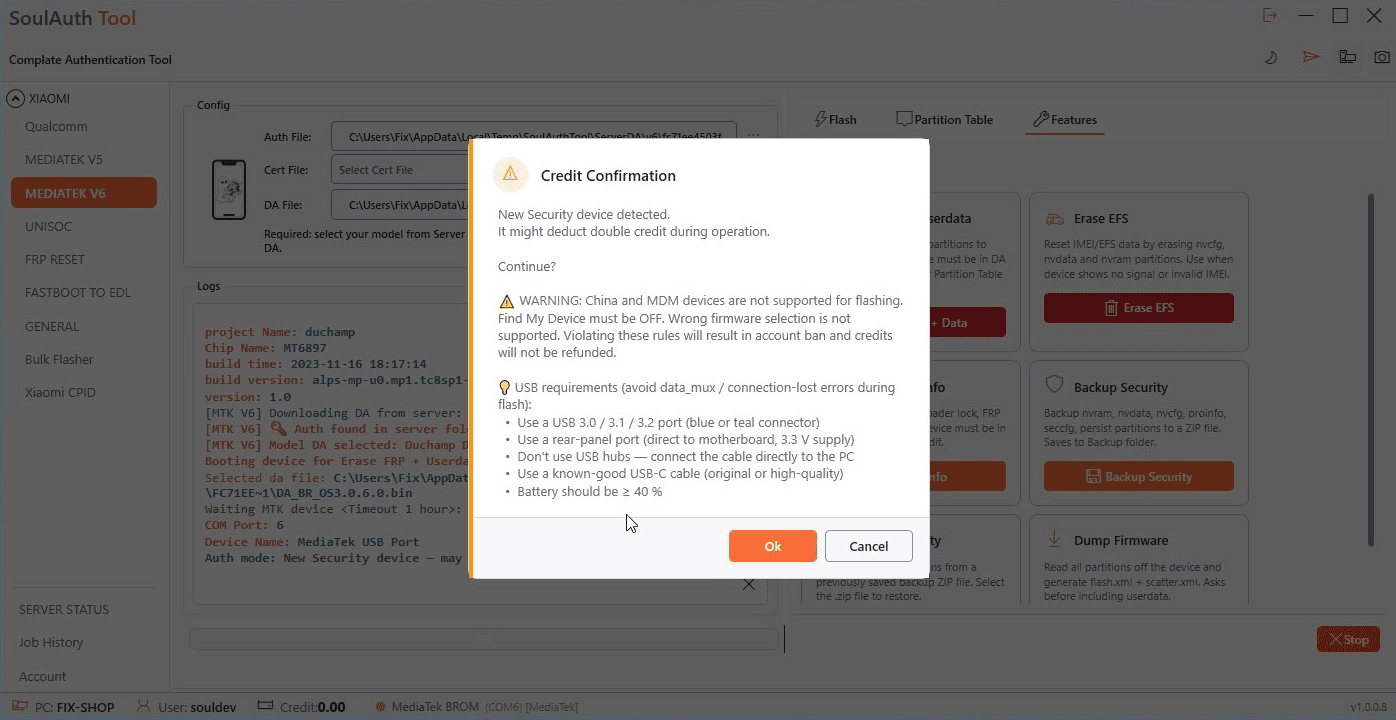
Before anything is written, the Credit Confirmation window opens. It is the same window you see before a flash, and the same rules apply here. On new security devices it also warns that the job may use double credit. Take a moment to read the USB tips in the window as well: most data_mux and connection-lost errors come from hubs, front-panel ports or weak cables. If everything is in order, click OK.
Step 5: Let the Tool Do the Work
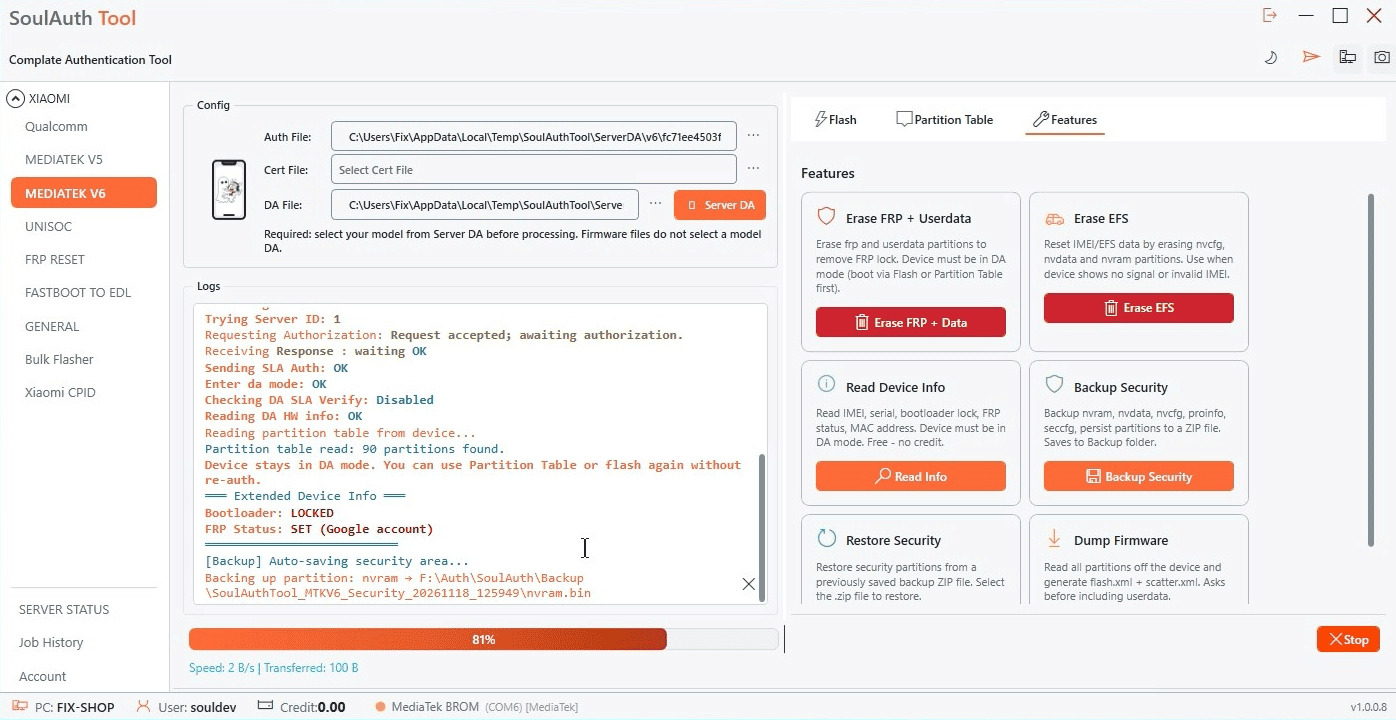
Authorization, DA mode and the partition table are all handled automatically. Just watch the log and do not unplug the cable. Before erasing, the tool reads the device info (bootloader and FRP status) and saves a backup of the security partitions (nvram, nvdata, nvcfg, proinfo, seccfg, persist) as a ZIP file in the Backup folder.
Step 6: All Done
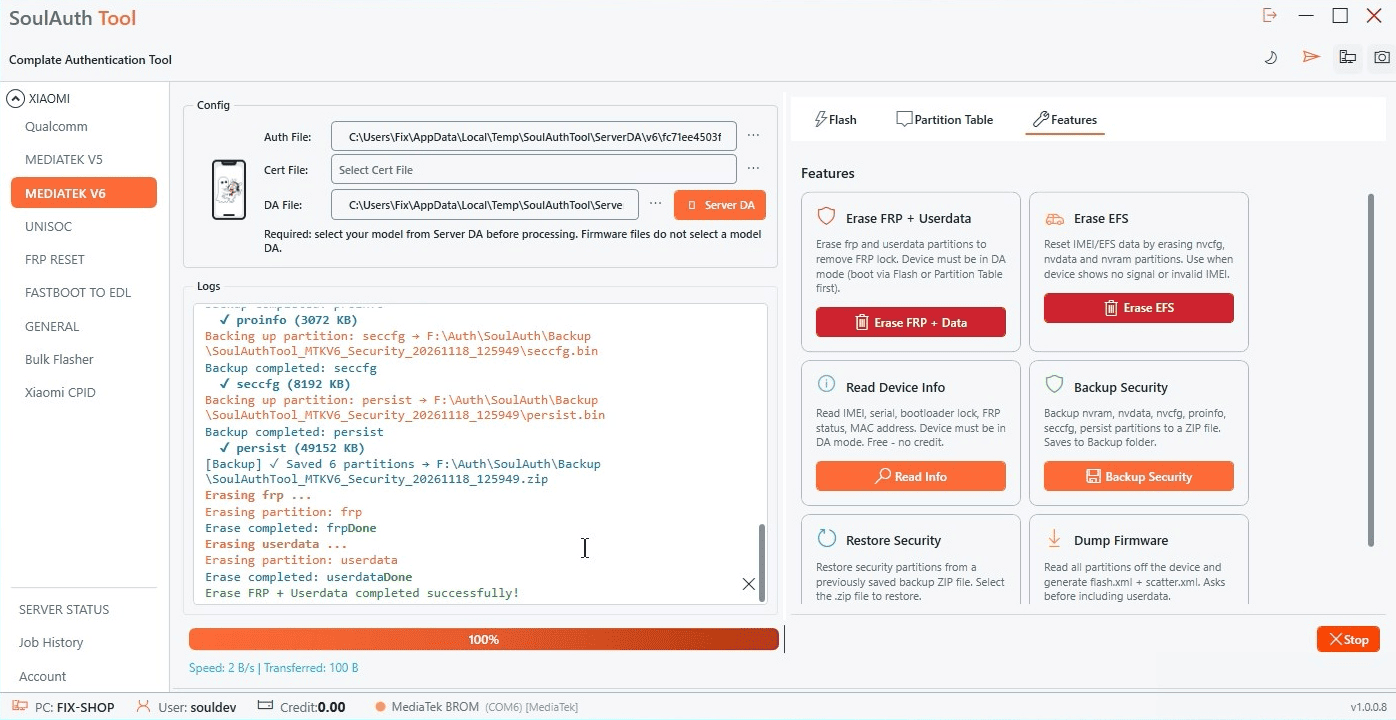
When the log shows Erase FRP + Userdata completed successfully! and the bar reaches 100%, the job is finished. Unplug the phone and power it on. It starts from a fresh setup screen with no Google account lock, ready to use.
Other Guides You May Need
When the FRP server is online, the standard method is the Xiaomi FRP and Factory Reset guide. Need a full firmware flash instead? Follow the MTK Flash guide.
Need Help?
If you run into any issues during the process, you can exchange ideas and get support from other users in the Community Chat section on our website.
Need this done on a real device right now?
Run it through SoulAuth's tools — no manual exploits, no guesswork.
View Services